Exporting databases from ParaView
ParaView’s 5.13 release included an advanced Cinema database exporter that makes it easy to create cinema databases from any scientific dataset.
This plugin exports cinema databases in the HDF5 format, which saves images of float values, instead of RGB images. These images can be composited and recolored with the pycinema toolkit. (as shown in the composite and recolor section).
The example below shows ParaView executing an export workflow, and displaying the results of the export. We will go through this process in detail, but for now, we show the overall ParaView application interface. Users can adjust the variables exported, the density and placement of camera positions, and adjust the overall visualization interactively in ParaView before exporting the image database.
You can download the ParaView state file for this example
here sphere.pvsm

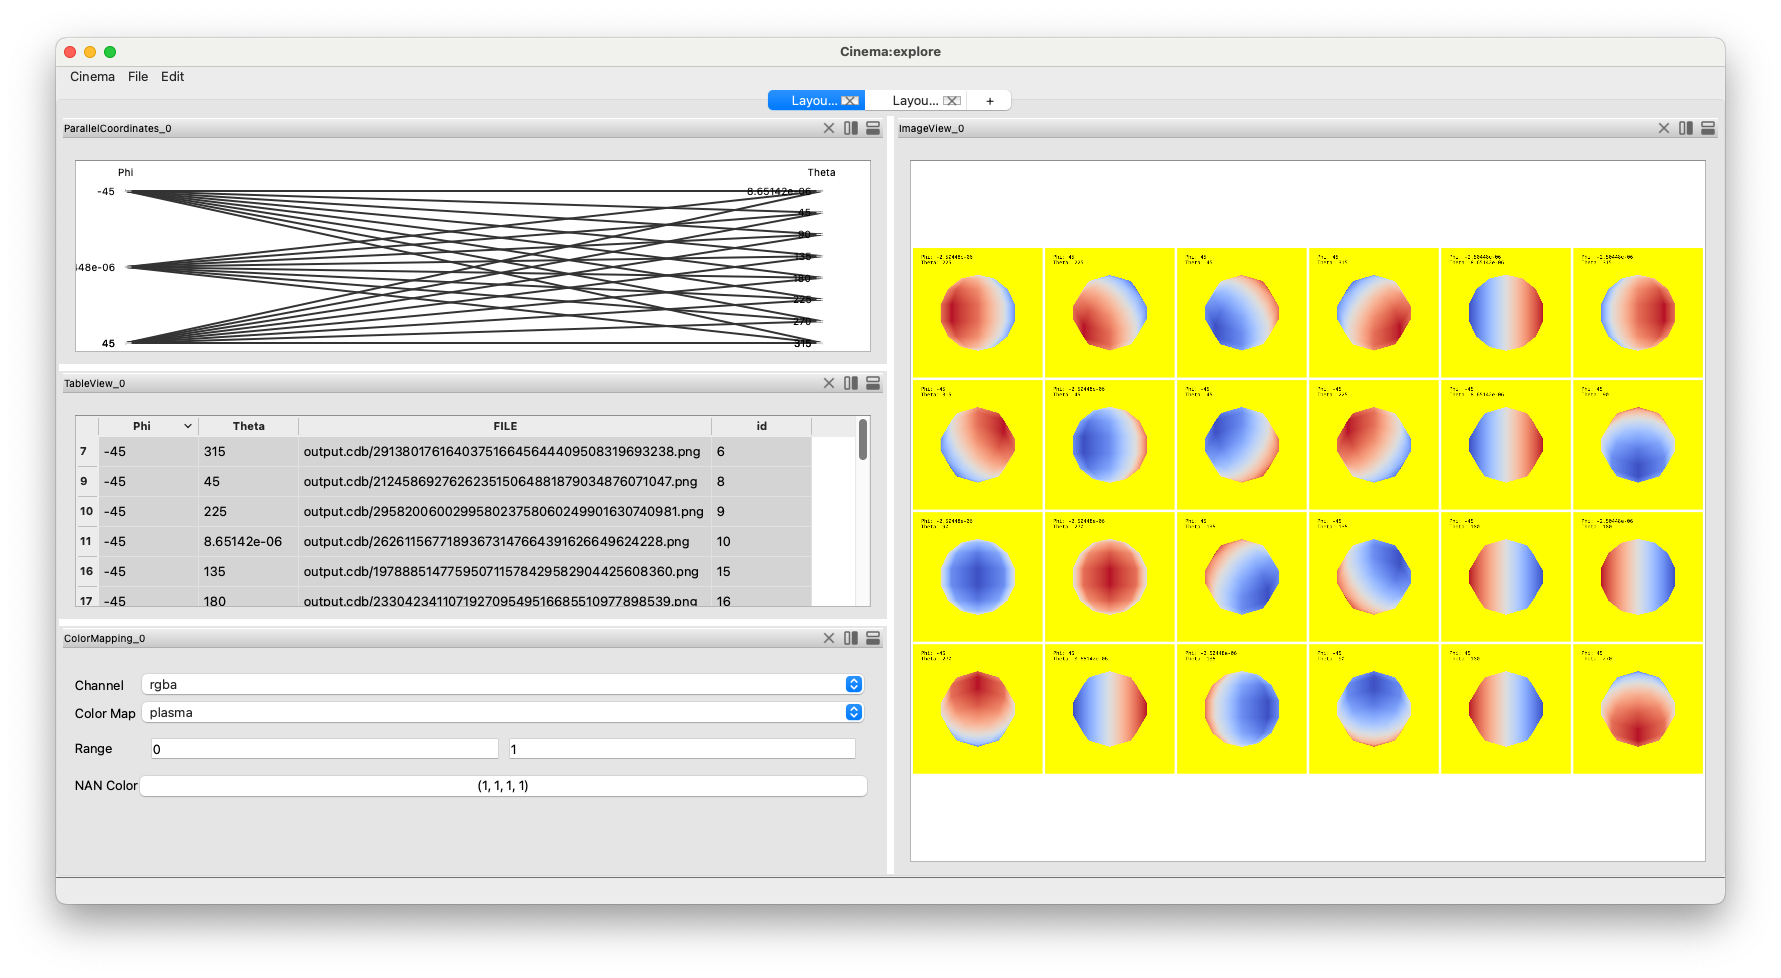
Once it is exported, we can use cinema explore, to investigate the
database, and explore ways to recolor the images interactively.
Loading the Cinema Export Module
To make sure that the Cinema Plugin is loaded: From the menu, choose Tools ->
Manage Plugins…. Find the CinemaExport plugin and click the arrow at the
left side to open the pluging options. Select the plugin by clicking on the
name, then click the Auto Load button. Next, click the Load Selected
button, then close the window.
The Cinema Export Plugin adds several filters to ParaView which help you create, view and export Cinema databases.
Cinema Camera Grid This creates geometry that determines the viewpoints in a cinema database.
Cinema Grid Layout This lays out the images from a Cinema Imaging filter in a ParaView window.
Cinema Image Compositing This allows compositing of Cinema images with multiple elements.
Cinema Imaging This generates the images of a dataset using the Cinema Camera Grid.
Cinema Writer This writes out the images and data.csv file for a Cinema database.
How to Assemble a Cinema Export pipeline in ParaView
Now let’s use these filters to export a cinema database from ParaView:
Create a sphere source.
Connect a calculator to the sphere source. Choose ‘Normals_X’ from the Scalars pulldown, and change the Result Array Type to Float.
Select the Sphere and add a Cinema Camera Grid filter.
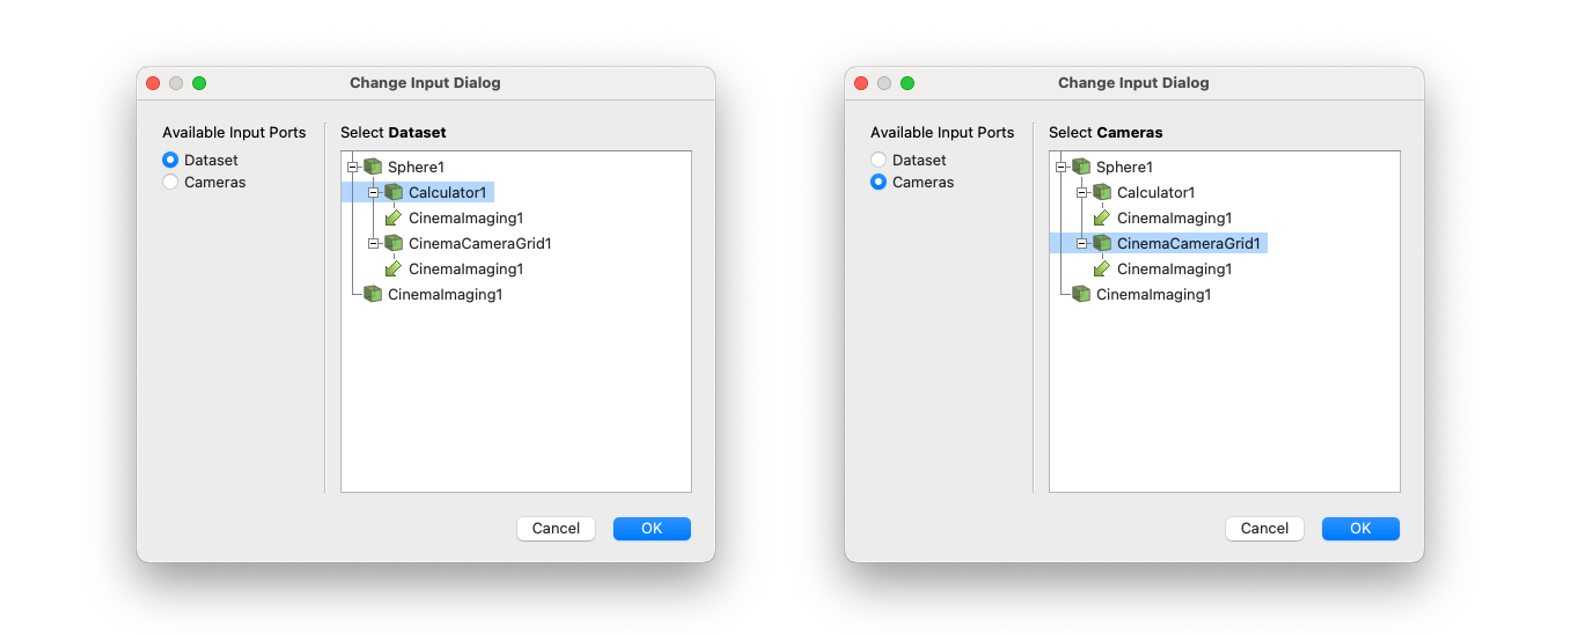
Add a CinemaImaging filter and set the Calculator as Dataset input, and CinemaCameraGrid as Cameras input. Do this by clicking on the radio buttons on the left side of the Change Input Dialog and selecting the correct filter from the pipeline on the right side of the Dialog.
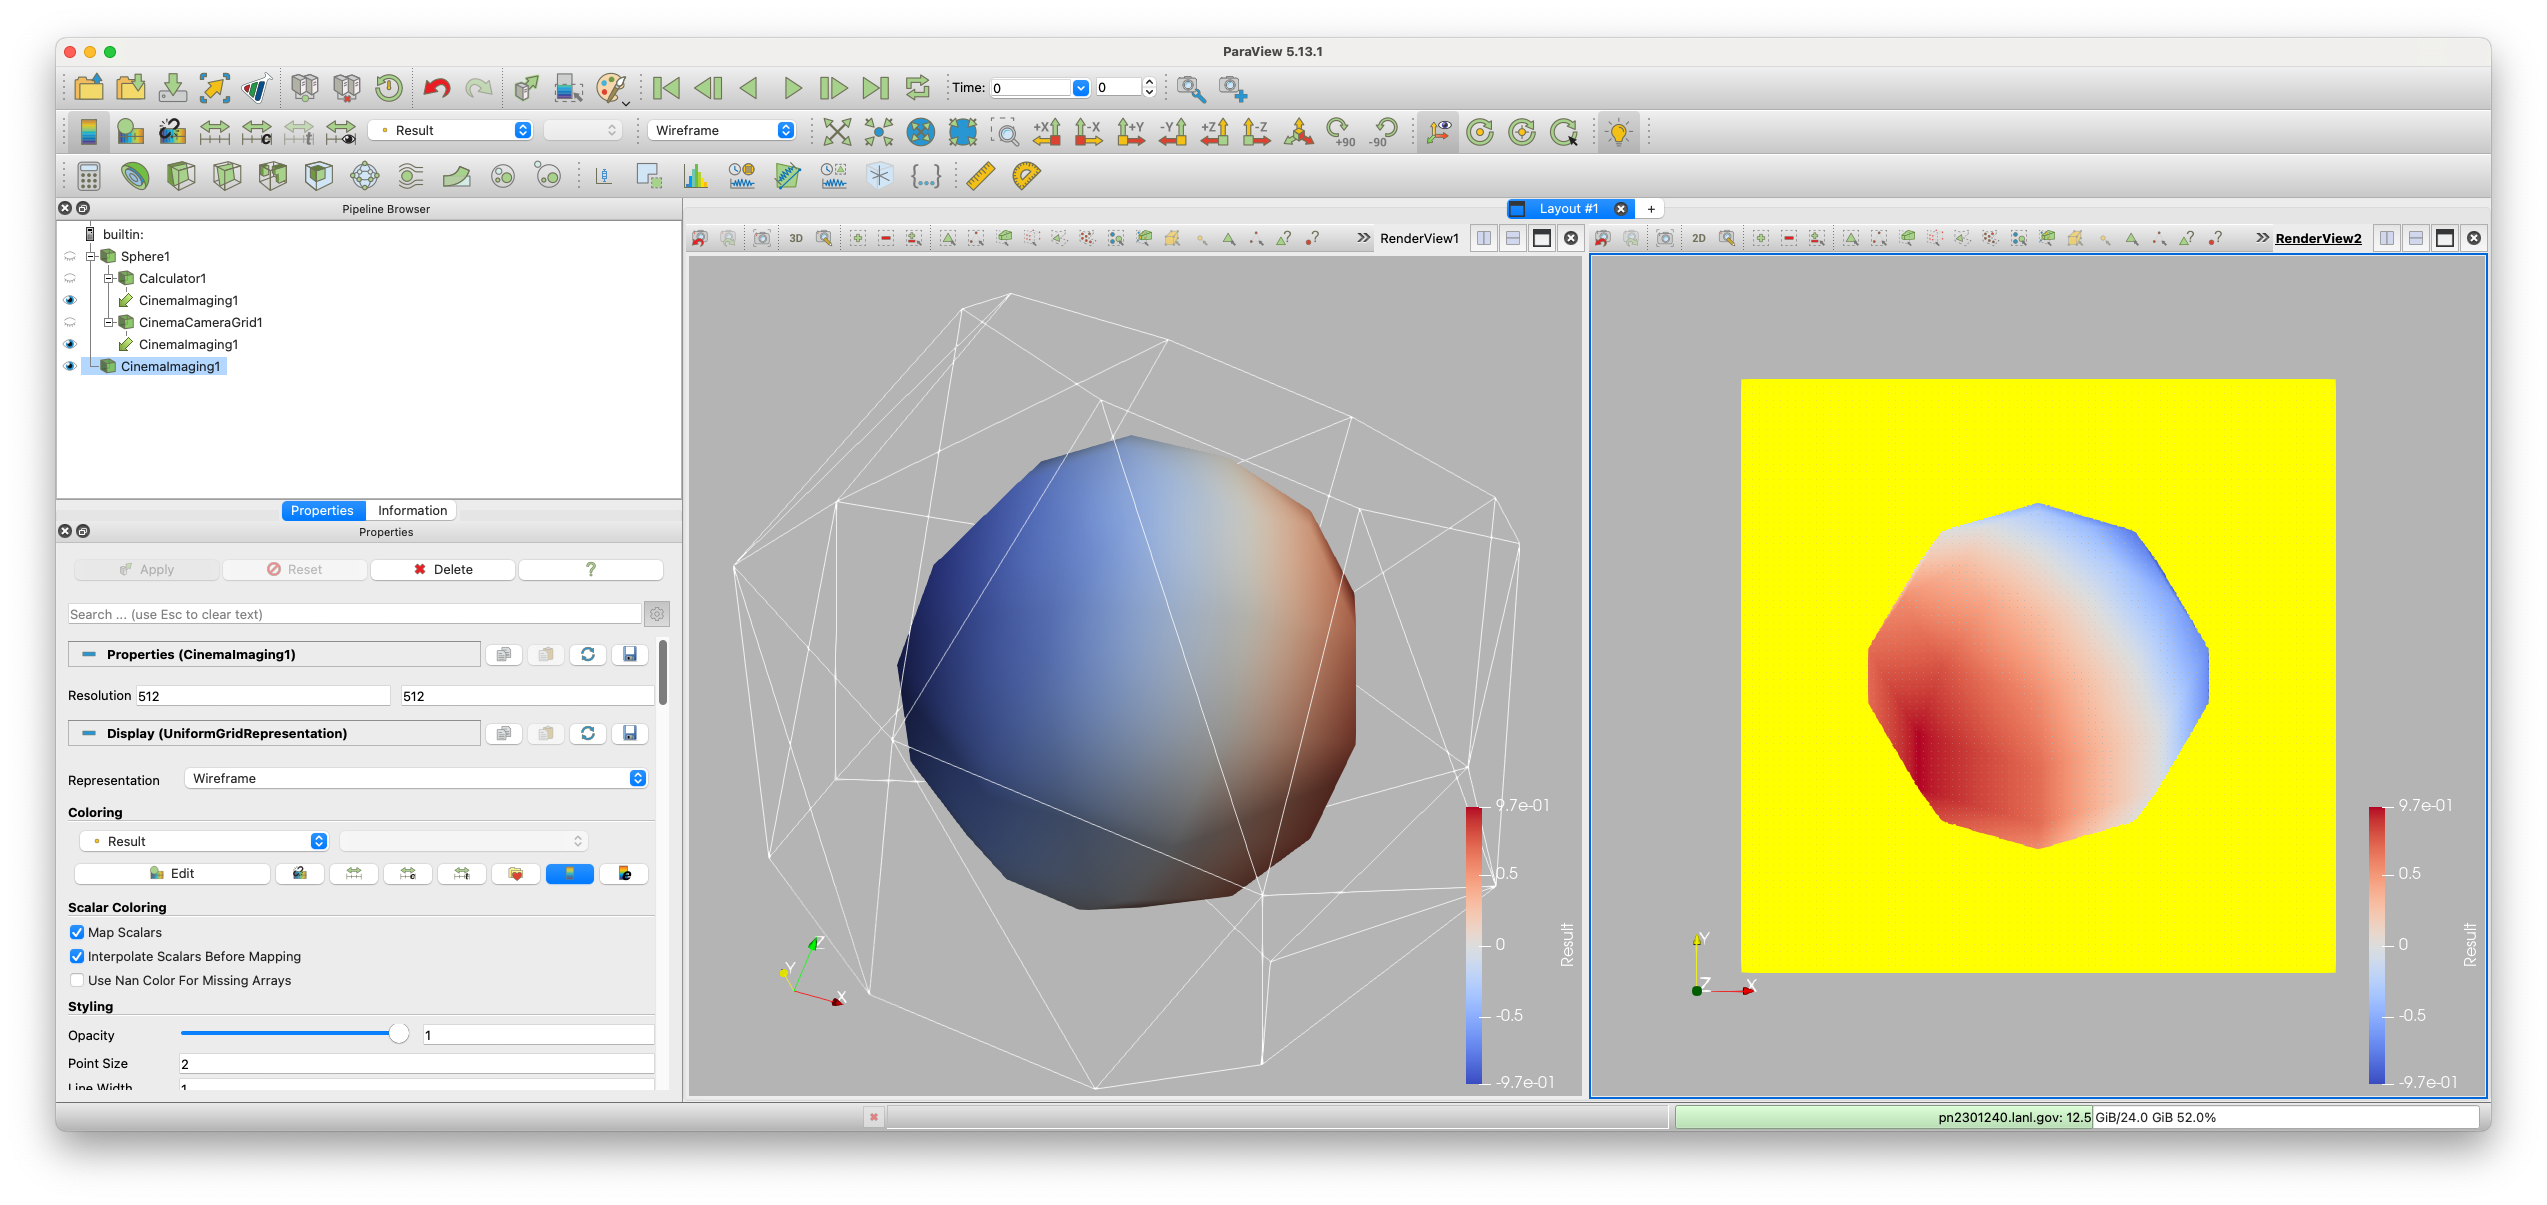
Click on the eye icons next to the Calculator filter and the CinemaCameraGrid filter so that those are the only things showing in the current render view.
Split the screen, create another RenderView and click on the eye icon next to the CinemaImaging filter so that it is shown in the second view. In the CinemaImaging filter properties under Coloring, select Result for the variable to be shown (see below)/
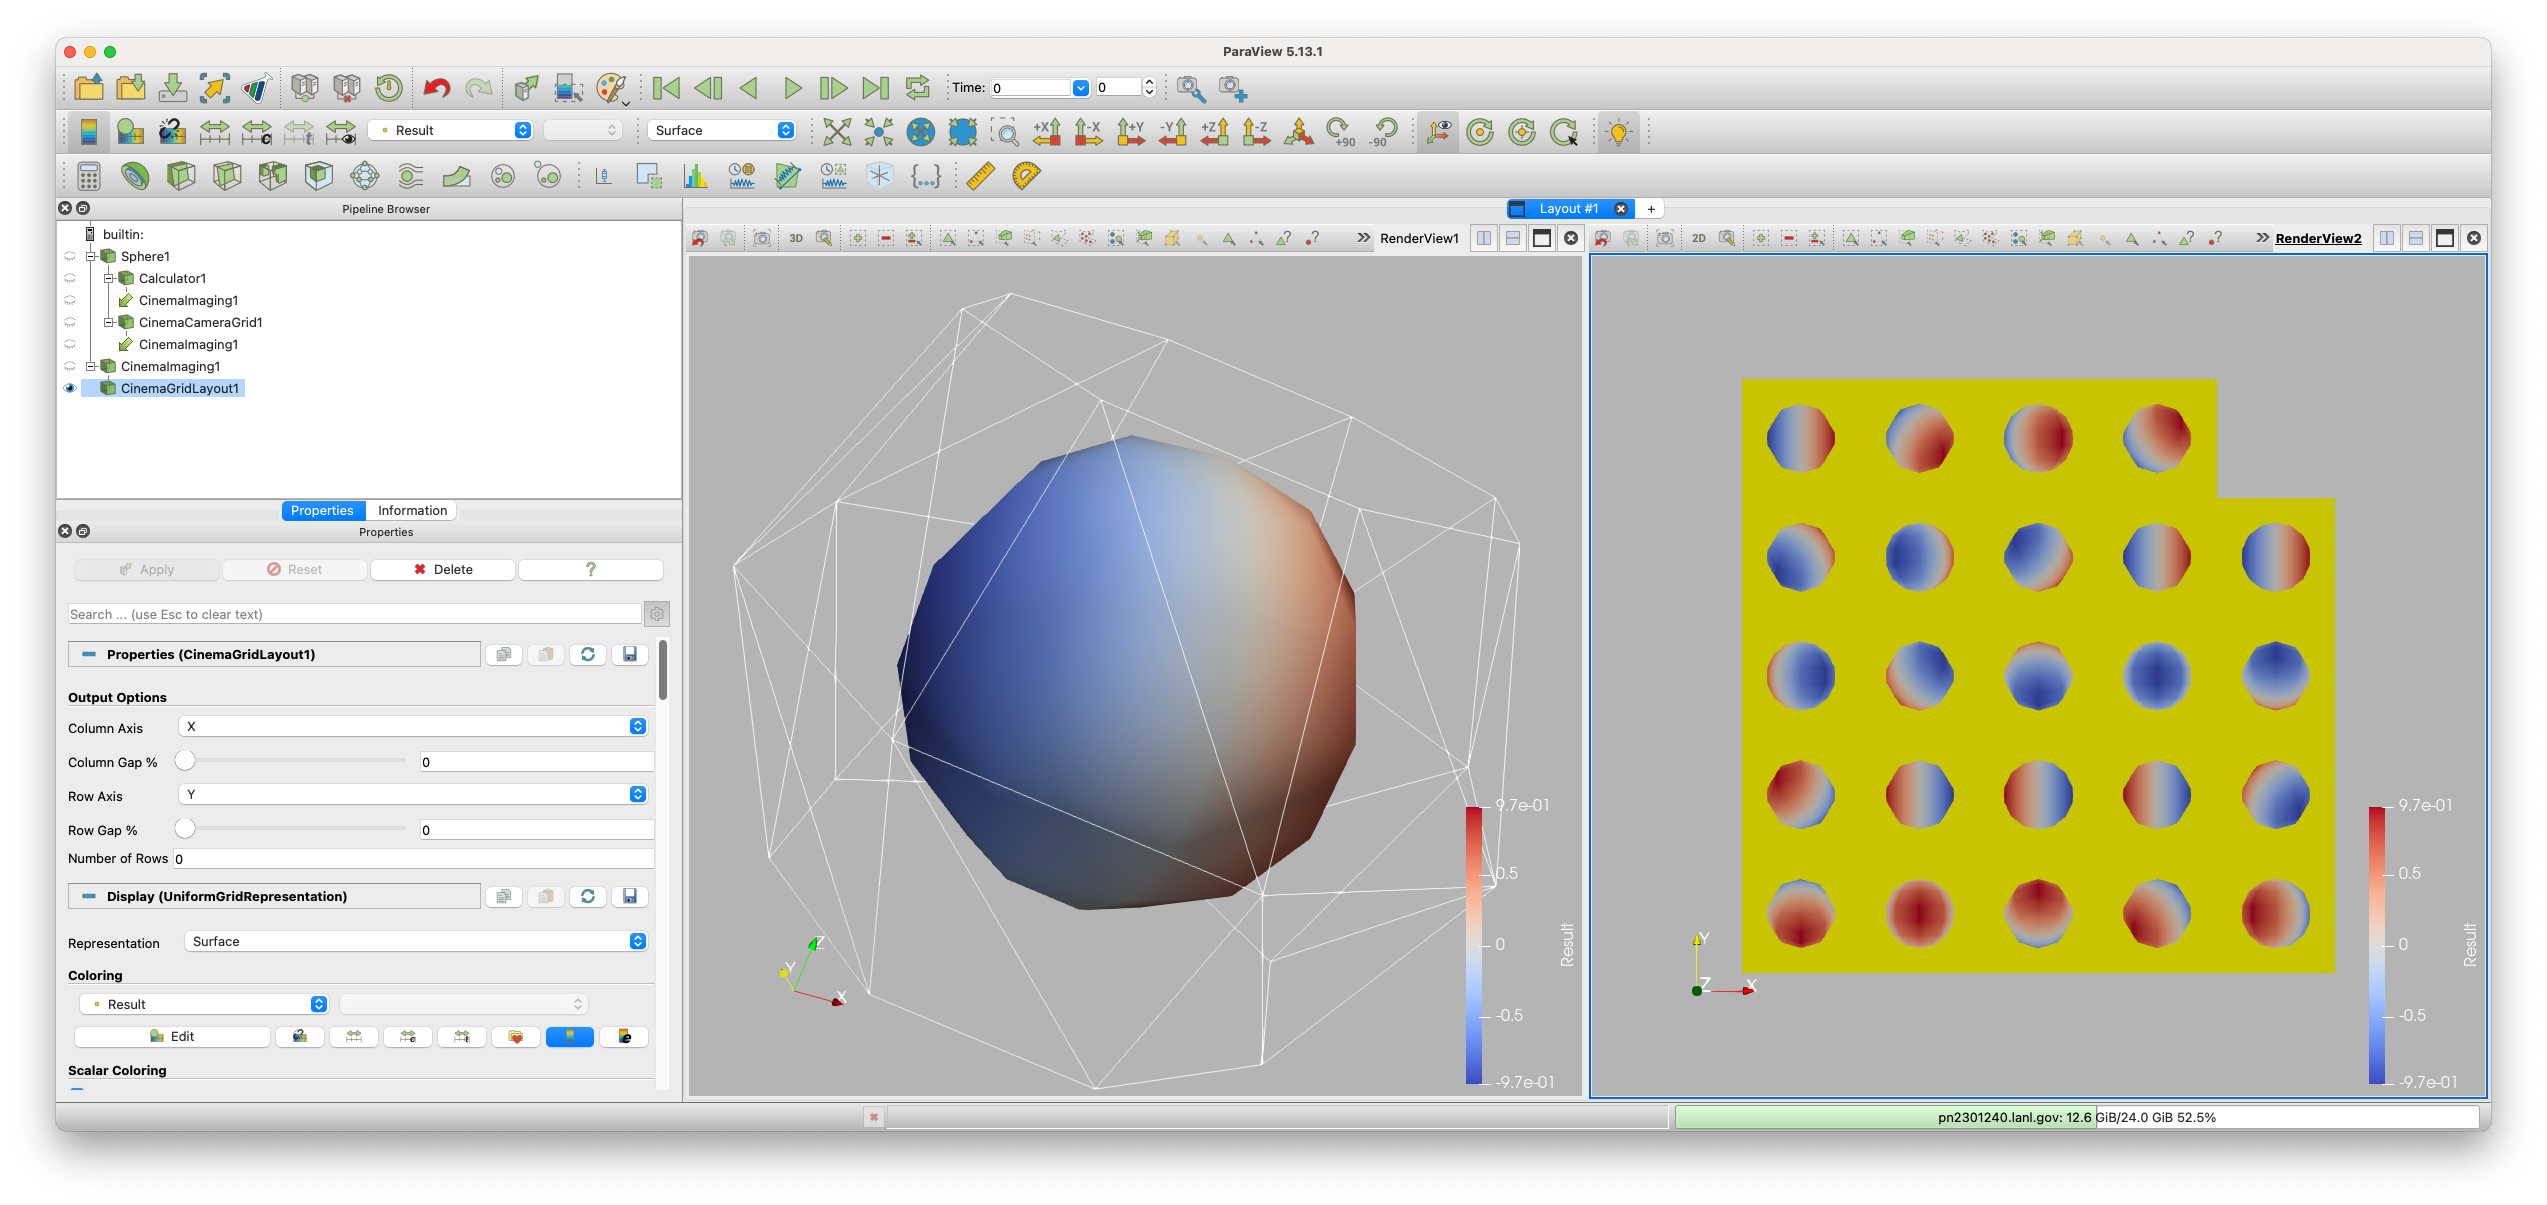
Select the CinemaImaging filter, and add a CinemaImageGridLayout filter to it. Then select the second render view by clicking in the window, and then click the
Zoom to Databutton to show all the images (see below).
To write this database to disk, select the CinemaImaging filter and add a CinemaWriter filter. Type a valid path ending in .cdb in the Output Directory text box, then click the
Applybutton. This will write images to the output directory. Then click theCreate data.csvbutton. This will write out thedata.csvfile in the Cinema database directory.